
Discover everything you need for installing ev charger at home in California. Learn costs, permits, and how to hire experts for a safe efficient setup.
Date
Nov 19, 2025
Author
RC Admin
Read
8 min

So, you're ready to install an EV charger at home. The process really boils down to a few key decisions: choosing between a Level 1 or Level 2 unit, making sure your electrical panel can handle the load, and hiring a licensed electrician to get the job done right. This guide is for consumers in California looking for a straightforward explanation without confusing technical jargon.
Let's start by comparing the two main options to see which one really fits your daily driving needs.
Comparing Level 1 and Level 2 Home EV Chargers
Deciding between a Level 1 and a Level 2 charger usually comes down to three things: your daily mileage, how fast you need to charge, and your budget.
For many drivers who cover less than 40 miles a day and can charge overnight, a simple Level 1 charger often gets the job done. But if you have a long commute, need a faster turnaround, or have multiple EVs in the household, the power of a Level 2 setup is probably what you're looking for.
What to Evaluate Before You Install
Before anyone starts drilling holes or running wires, take a walk from your electrical panel to your preferred parking spot. This simple site survey can save you from surprises later on.
Driveway distance: The farther your parking spot is from the panel, the more it will cost in labor and materials for the conduit run.
Panel load: Take a look at your panel. Do you have empty breaker slots? Is there enough power to support a new 240V circuit? An electrician will check this first.
Smart features: Consider a charger with WiFi scheduling. This lets you take advantage of cheaper off-peak electricity rates from providers in California.
Backup readiness: If you have a home backup generator or solar-powered generator system, make sure the charger you choose is compatible with your whole-home power system.
Permit costs: Here in California, you'll need to factor in city or county inspection and permit fees into your total budget.
Rebates: Don't leave money on the table! Look into incentives from utilities like Southern California Edison (SCE) that can significantly lower your final cost.
Key takeaway: A Level 2 charger can slash your overnight charging time from over 14 hours down to less than 4, a game-changer for busy households or drivers with long commutes.
To put it simply:
A Level 1 charger runs on a standard 120V household outlet. No major installation is needed.
A Level 2 charger requires a dedicated 240V circuit, which means a new breaker and professional wiring.
Installation costs for a Level 2 setup typically start around $500, whereas a Level 1 charger is essentially plug-and-play.
The real difference is speed. You'll go from adding 3–5 miles of range per hour with Level 1 to a much faster 12–30 miles per hour with Level 2.
Level 1 vs Level 2 Home EV Chargers at a Glance
For a quick side-by-side look, here’s a breakdown of the key differences between the two types of home chargers.
Feature | Level 1 Charger | Level 2 Charger |
|---|---|---|
Voltage | 120 V | 240 V |
Installation Complexity | Plug into standard outlet without upgrade | Dedicated circuit, professional wiring needed |
Charging Speed | 3–5 miles of range per hour | 12–30 miles of range per hour |
Typical Charger Cost | $0–$500 | $500–$1,200 |
This table makes it clear why most serious EV owners in California quickly opt for a Level 2 installation. The convenience and speed are simply unmatched for daily use.
Why Home Charging Still Reigns Supreme
Even with more public charging stations popping up, the vast majority of EV owners still plug in at home. In fact, the 2025 EV Charging Index reports that about 85% of EV users rely on their private or shared home charging setup. You can discover more insights about home charging trends to see why it remains the most convenient option.
The benefits are clear. Installing a charger at home saves a massive amount of time by letting you refuel overnight instead of waiting around at a public station. It also boosts your property value, as a professionally installed Level 2 charger is a highly sought-after feature for potential home buyers who own or plan to own an EV.
Plus, when paired with a home backup system like a Generac generator or a home battery, your EV charger can become part of a complete energy resilience plan, keeping you powered up even during grid outages caused by fires or storms.
Ready to make the switch? Contact RC Generators and Electric today for a free site assessment in Los Angeles and Ventura County. We'll help you get your installation scheduled quickly and easily.
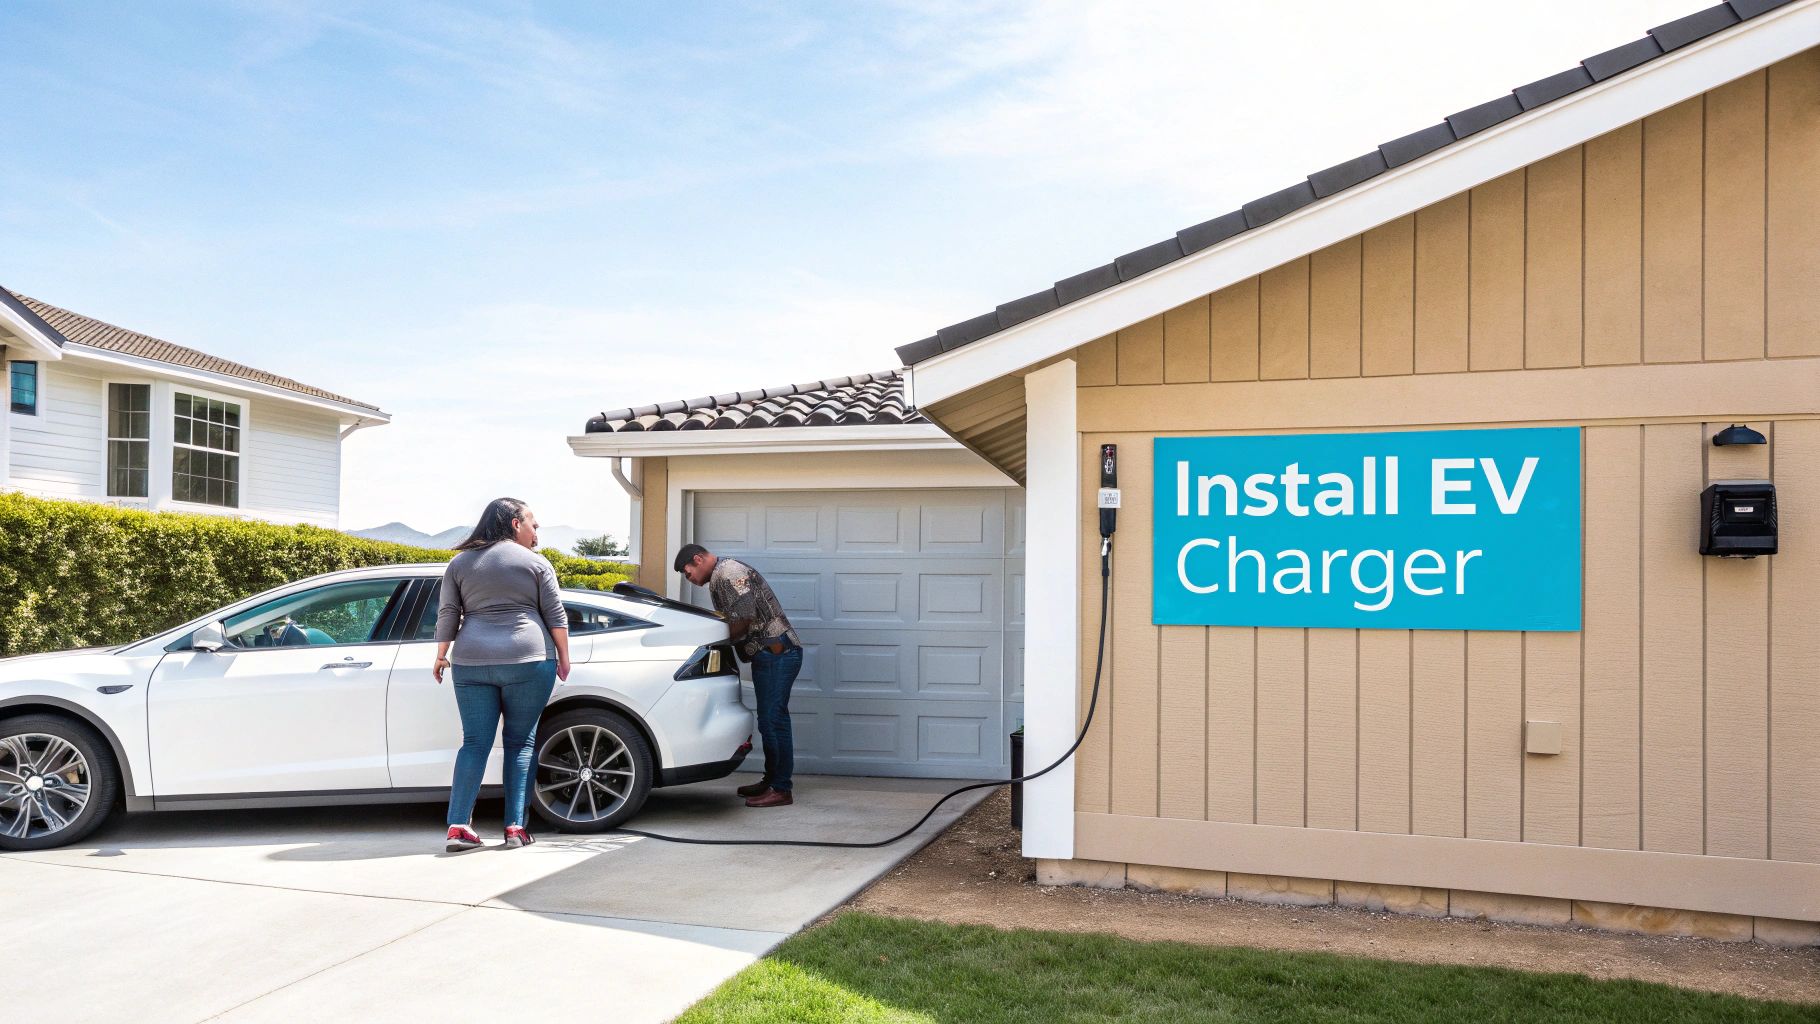
Preparing Your Home for an EV Charger
Before an electrician even steps on your property, a quick walkthrough of your own space can make a world of difference. Think of it as a pre-flight check for your electrical system. Taking a few minutes to do this will help you anticipate questions, spot potential hurdles, and get a much clearer idea of what the installation will really involve.
Start where you park your car. Whether it's the garage or the driveway, stand in that spot and then find your main electrical panel. Now, try to trace the path a wire would need to take to connect the two. Are there obstacles in the way, like a water heater, hefty storage shelves, or some awkward corners? The shorter and more direct that path is, the simpler—and usually cheaper—the installation will be.
Is Your Electrical Panel Ready?
Your home's electrical panel is the heart of its power system, and it’s the single biggest factor when installing a Level 2 charger. A Level 2 charger is a serious electrical appliance, almost like adding another central air conditioner. Your panel absolutely must have enough capacity to handle it safely.
Most modern homes in California have a 200-amp (A) panel, which typically leaves plenty of room. However, older homes, especially some of the charming bungalows you see around Ventura County, might still be running on a 100A or even a 60A panel.
You can do a quick visual check yourself. Just open the panel door (the outer one, not the cover hiding the wiring) and look for the main breaker. It's usually a large switch at the very top or bottom. It will have a number stamped on it, like "100" or "200," which tells you its power rating. If you see 100A or less, an upgrade is almost certainly in your future.
Here are a few tell-tale signs that your panel might already be maxed out:
Lights flicker whenever a big appliance like the AC or microwave kicks on.
You find yourself resetting tripped breakers often, a sure sign of overloaded circuits.
You open the panel and see there's no physical space for a new double-pole breaker, which every 240V charger needs.
If any of this sounds familiar, don’t sweat it. This is a common hurdle and a key part of getting your home ready for an EV. Tackling it now ensures your entire electrical system is safe, reliable, and up to modern standards. To get a better handle on this, you can learn more about what a home electrical panel upgrade involves in our detailed guide.
A Real-World Scenario in Ventura County
We see this all the time. A client in a 1970s Ventura County home called us, excited about their new EV but unsure about the charger install. During our site assessment, we found their original 100A panel was completely full—no empty slots—and already supporting a central AC unit, an electric dryer, and the rest of the house.
Trying to squeeze in a 40A charger would have dangerously overloaded their system. The only safe solution was a main panel upgrade. In just a few hours, our team swapped the outdated box for a new 200A panel. This didn't just create a safe, dedicated circuit for the EV charger; it also gave them plenty of extra capacity for future projects, like a solar-powered generator or home battery backup system. It was a straightforward upgrade that delivered 240V power and total peace of mind.
Planning for Wiring and Placement
Once you've sized up your panel, think about where the charger itself will live. The best spot is usually close to where your vehicle's charge port is when parked. This simple detail prevents you from having to stretch the charging cable across a walkway, which can be a tripping hazard.
Keep these factors in mind for placement:
Cable Length: Most EV chargers come with a cable that's 18 to 25 feet long. Make sure that’s enough to comfortably reach your car's port without being pulled tight.
Weather Protection: If your charger is going outside, try to pick a spot that offers some shelter from direct sun and rain. While quality units are built for the outdoors, a little protection goes a long way.
Future Needs: Think you might get a second EV down the road? Planning for that now could help you place the charger in a spot that can eventually serve two parking spaces.
By mapping out the path, checking your panel, and planning the final placement, you'll be ready for your consultation. You’ll have the right questions to ask and can give your electrician the details they need for an accurate quote and a seamless installation.
If you're in the Los Angeles or Ventura County area and ready for the next step, contact RC Generators and Electric today for a professional site assessment. We’ll walk you through every part of the process, from panel checks to final setup.
Understanding EV Charger Installation Process
Getting your home EV-ready is just the beginning. Next comes the real work: mapping out every step from that first phone call to the final inspector sign-off. A clear, methodical approach keeps surprises at bay and puts safety front and center.
Meet Maria. She lives in Los Angeles County and wanted a Level 2 charger in her garage, about 30 feet from her electrical panel. Her experience shows exactly what a professional installation looks like, start to finish.
The Initial Consultation And Site Visit
Maria kicked things off with a quick phone call. She explained her plan: install a Level 2 unit in the garage. Within 24 hours, a licensed electrician was on site to take measurements and assess her setup.
During that visit, the electrician:
Verified her 200A panel could handle the new charging load
Identified two open slots ready for a new breaker
Sketched a path for the wiring that was neat and out of the way
Discussed optimal charger placement so the cord would reach easily
This hands-on check is crucial. It uncovers hidden snags—like outdated wiring or tight clearances—that affect both cost and schedule.
From Quote To Permit Filing
Maria received a detailed quote the next day. It broke costs down clearly: labor, materials (wiring, breaker), the charger unit, and permit fees. No surprises.
After she signed off, the electrician took care of the permit. They submitted plans to the Los Angeles County Department of Public Works, ensuring every drawing met local building and electrical codes. In California, licensed pros must often handle this step.
Safety First Communication: Always confirm your electrician will shut off main power and perform a full system test before they leave. Clear safety protocols are non-negotiable.
Installation Day What To Expect
A week later, permits approved, Maria scheduled the install. Her crew arrived on time and outlined a 4–6 hour window. She knew the main power would be off for about an hour during breaker installation.
On install day, the team:
Ran protective wiring from the panel to the charger location
Pulled the heavy-gauge copper wiring through
Powered down the panel, installed a new 40A breaker, and connected the circuit
Secured the charger to the wall and made all final connections
Restored power and ran tests to verify safe, reliable operation
They laid down drop cloths to minimize dust and left the workspace spotless.
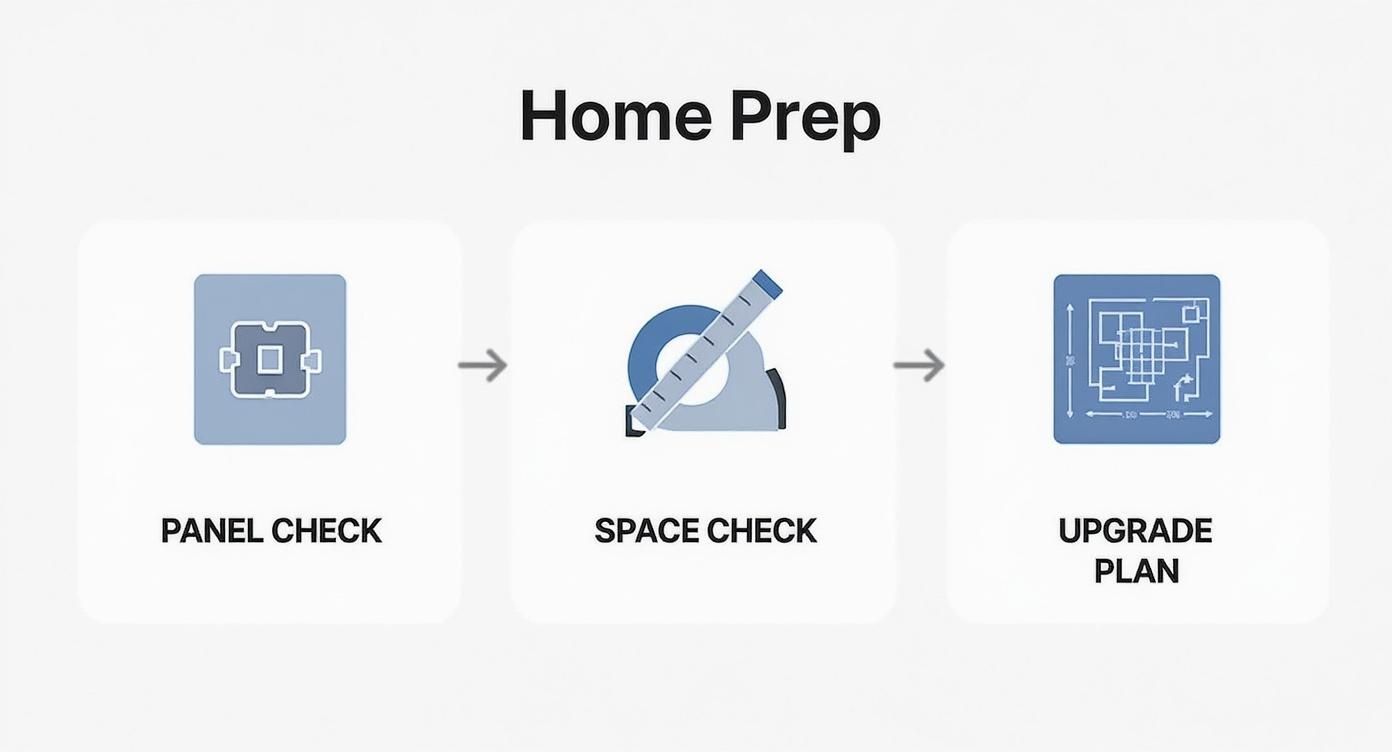
This infographic highlights how a successful project starts long before installation day—with careful panel checks, space planning, and load calculations.
The Final Inspection And Sign-Off
Two days after the install, a county inspector arrived to review the work. They checked every connection against code requirements and officially signed off on Maria’s permit. That final stamp is your guarantee the job is safe and compliant.
Home EV charging isn’t a niche anymore—there are about 4 million charge points in the U.S. today and forecasts suggest this will jump to 35 million by 2030.
By that time, roughly 80% of these spots will be in residential settings. For more on these trends, check out the EV Charging Market Growth report.
Ready to start your own installation journey? Contact RC Generators and Electric today for a free, no-obligation site assessment in Los Angeles or Ventura County. We’ll guide you through every step—just like we did for Maria.
Costs, Rebates, and Timelines
Figuring out the budget for your home EV charger doesn't have to be a shot in the dark. Once you know what drives the costs, you can get a realistic idea of the final price tag, which really comes down to your home’s electrical setup and how complex the job is.
Breaking Down Real-World Costs
So, what should you actually expect to pay for a Level 2 charger installation here in Southern California? The biggest factor is the distance from your electrical panel to your parking spot—that dictates how much wiring and labor will be needed.
Here are a few common scenarios we see all the time, based on actual jobs in the area:
The Straightforward Job: If your panel has enough capacity and is less than 20 feet from the charger location, you're likely looking at a bill under $1,200. This usually covers the Level 2 unit, wiring, a new breaker, and all the professional labor.
The Panel Upgrade: Got an older 100A panel? It’ll almost certainly need an upgrade to handle the load safely. Here in Los Angeles or Ventura County, that work typically runs between $1,800 and $3,500, depending on the new panel size and if any other wiring needs to be updated.
The Long Haul: For homes with detached garages or parking spots far from the panel, costs can climb into the $4,500 to $6,000 range. These jobs require a lot more material and labor, sometimes involving trenching to bury the wiring.
For a deeper dive into these numbers, check out our complete guide on the electric vehicle charger installation cost, where we detail every little thing that can influence your final quote.
Maximizing Rebates and Tax Credits
One of the best parts about getting an EV charger in California is the sheer number of financial incentives out there. These programs can seriously reduce your out-of-pocket expense, often cutting the net cost by 30% to 50%.
Don't leave money on the table. Stacking federal credits with state and local utility rebates is the smartest way to make your EV charger installation more affordable. Many of our clients are surprised by how much they can save.
Here’s how you can stack the savings:
Federal Tax Credit: Homeowners can often claim a federal tax credit for a percentage of the total project cost.
California Clean Fuel Reward: This is a statewide program that offers rebates to residents who install qualified charging equipment.
Local Utility Rebates: Companies like Southern California Edison (SCE) frequently have their own rebate programs to encourage off-peak charging and help balance the grid.
Make sure to check the official program websites, as the rules and amounts can change. A good electrician can also point you toward the incentives you qualify for.
Understanding the Project Timeline
From the first phone call to the final inspection, a professional installation follows a pretty clear path. Knowing the steps helps you plan accordingly without any surprises.
Here’s what a typical project timeline looks like:
Quote and Site Assessment: This is fast. We can usually get this done within 2 days of you reaching out.
Permit Application: Your electrician handles filing all the paperwork with your city or county. Getting approval usually takes 1 to 2 weeks.
Installation Day: The actual install is quick—it’s almost always a one-day job, taking just 4–8 hours.
Final Inspection: A city or county inspector will stop by to sign off on the work, typically within 48 hours after the installation is complete.
The global market for EV charger installation is booming, projected to hit $8 billion in 2025 and grow at 25% annually through 2033. This growth means it’s more important than ever to work with an established, reliable company that knows what they're doing.
Ready to get a clear, no-surprise quote for your home? Contact RC Generators and Electric today for a free home assessment in Los Angeles or Ventura County and let's get you charging.
Why Professional Installation Is Essential
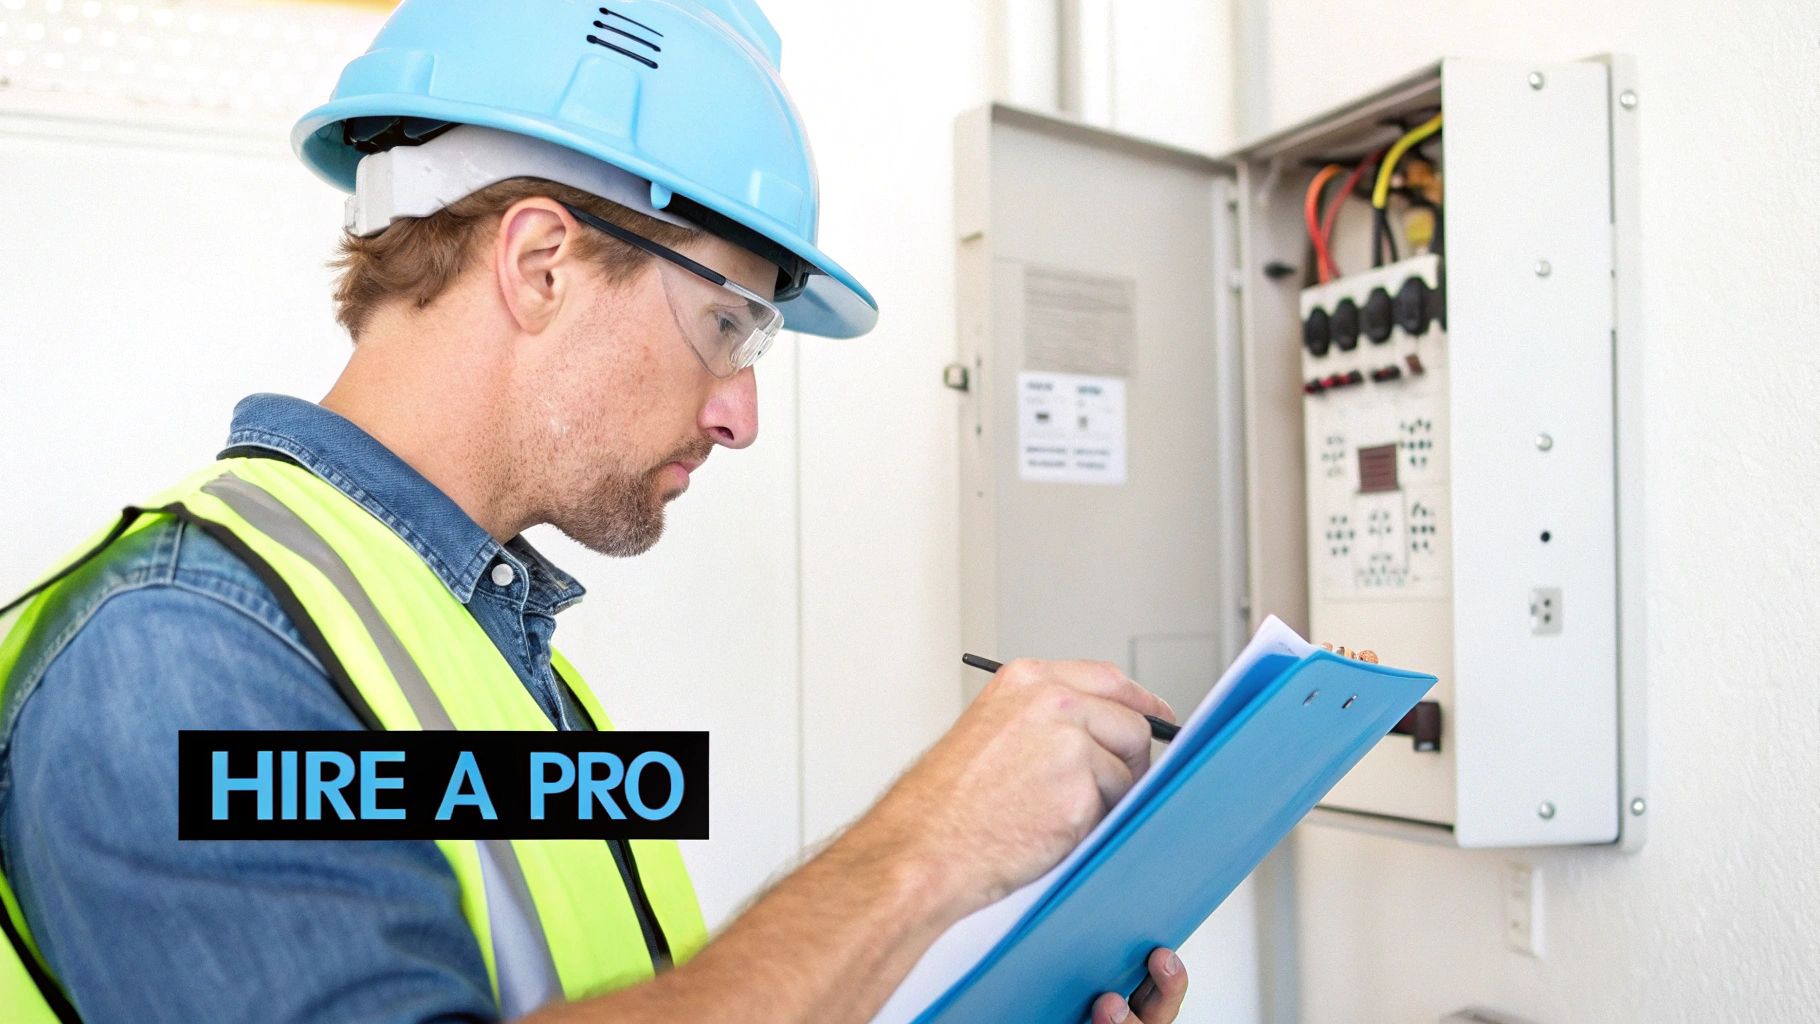
It can be tempting to grab a DIY kit from the hardware store and try to save a few bucks. But when you’re dealing with high-voltage wiring, a small mistake can have massive consequences.
We're talking about the risk of electrical fires, voided homeowner’s insurance, and damage to your brand-new EV. It’s simply not worth it.
Hiring a licensed and experienced electrician is the only way to guarantee the safety of your family and your property. A pro knows the local codes and safety requirements inside and out. They ensure every connection is tight, every wire is the correct size, and the entire setup is fully compliant.
Think of it like this: a DIY job might work for a while, but a professional installation is built to last safely for years.
Finding the Right Electrician
Before you hire anyone, a little homework goes a long way. This isn't just about finding the cheapest quote; it's about finding a qualified professional you can trust inside your home.
First, verify their credentials. In California, any legitimate electrical contractor must hold a C-10 electrical license. Don't be shy about asking for proof of their liability and worker’s compensation insurance, either. This protects you in case anything goes wrong on the job.
Next, check their reputation. Look up local reviews on Google or Yelp, specifically for projects in Los Angeles and Ventura County. You want to see a track record of successful EV charger installations, not just general electrical work.
A few simple steps can help you avoid major headaches:
Ask trusted neighbors for referrals and get at least three different quotes.
Double-check their license status on the official CSLB website.
Look through their project photos and client testimonials to see if they’ve handled setups similar to yours.
"A licensed electrician ensures your installation meets both safety standards and insurance requirements, giving you total peace of mind." – Electrical Safety Foundation International
Key Questions to Ask During a Consultation
When you have a few potential electricians lined up, a focused consultation is your best tool for making the right choice. Come prepared with a handful of smart questions to see who really knows their stuff.
Here are five must-ask questions to get the conversation started:
How much experience do you have with Level 2 EV charger wiring specifically?
Do you handle the entire permitting and inspection process for Los Angeles and Ventura County?
If my panel needs an upgrade, can you explain the process and the costs involved?
What specific materials do you use to protect outdoor wiring from weather?
Can you provide a detailed, itemized quote breaking down all labor, materials, and permit fees?
These questions do more than just get you a price. They reveal how transparent, experienced, and thorough a contractor is. The right pro will have clear, confident answers for every single one.
Why RC Generators Makes a Difference
At RC Generators and Electric, we bring a unique perspective to every EV charger project, backed by decades of experience in full-system backup power. Our technicians have installed hundreds of home standby generators like Generac, solar-powered generators, and home battery systems, which means we’re experts at integrating new high-draw appliances into a home's existing electrical ecosystem.
We specialize in making sure your new EV charger works seamlessly, even if you have a backup generator or home battery system. You can see an overview of our process and local work on our EV charger installation services page.
Just as with any major home upgrade, understanding the importance of hiring professional services is key to a successful outcome.
Our team handles everything from start to finish:
Seamless permit filing with the correct city and county authorities.
Durable wiring designed to protect against Southern California’s weather.
Smart integration with backup generators, battery systems, or solar setups.
Full coordination of the final inspection to ensure your project gets code approval on the first try.
A Quick Case Study from Ventura County
A homeowner in Rancho Santa Paula learned the hard way after a DIY install went wrong. When the city inspector showed up, they flagged multiple code violations. The wiring wasn't protected correctly, and their electrical panel was already maxed out with no room for a new breaker.
Our team was called in to fix it. We upgraded their panel to a modern 200A service, rerouted the wiring properly, and made sure every connection met strict code requirements. The final inspection passed without a single issue.
This project is a perfect example of why professional expertise is so critical.
The panel was upgraded to safely support a powerful 48A Level 2 charger.
All wiring was properly protected and rated for outdoor exposure.
Our crew pulled the new permit and scheduled the final inspection.
Now, the homeowner charges their EV every night, confident that the system is safe, reliable, and professionally installed.
The Bottom Line
Always choose safety over trying to save a few dollars upfront. A professional EV charger installation is an investment in your home's reliability, your family's safety, and your own peace of mind.
Ready to get a safe, code-compliant EV charger installed the right way? Contact RC Generators and Electric today for a no-obligation site assessment, and let a certified pro handle the rest.
Getting Started: Your EV Charger Installation Plan
Alright, you’ve got a handle on the costs, permits, and what separates a pro job from a DIY disaster. Now for the exciting part: turning those plans into reality. Getting an EV charger installed at home isn't complicated, but moving forward with a clear strategy makes all the difference.
First things first, grab a tape measure and walk the path. Start at your main electrical panel and trace the route to where you’ll park your car. Take note of the distance and anything in the way—walls, walkways, landscaping. This simple walk-through gives you a real-world feel for the project and is exactly the kind of info an electrician will need.
Your Action Plan for a Smooth Install
A little organization now will save you a ton of headaches later. Think of it as a pre-flight checklist. Knocking out these small tasks ensures you’ve covered all your bases before any work actually begins.
Here’s a practical checklist to get you going:
Get a Few Quotes: Don't just call one electrician. Reach out to at least three licensed pros in your area. This isn’t just about finding the lowest price; it’s about comparing their approach, timeline, and how they itemize the quote. Make sure they break down costs for labor, materials, and permit fees.
Hunt for Rebates: Before you sign anything, check for money-saving programs. Hop on the websites for your local utility—like Southern California Edison (SCE)—and the state of California. Bookmark any pages for rebates or tax credits so you can apply the second the job is done.
Grab the Permit Forms: Head over to your local city or county website. For folks in our area, that’s usually the Los Angeles County Department of Public Works. Find and download the electrical permit applications. Your electrician will be the one filing them, but reading through the forms yourself gives you a head start on understanding the official requirements.
Schedule a Pro Assessment: This is the most important step. Have an expert come out to your home for a site visit. They can pop open your panel, confirm you have enough capacity, pinpoint the perfect spot for the charger, and give you a firm, no-surprises quote.
Taking these steps ahead of time does more than just streamline the process—it puts you in the driver's seat. You’ll walk into those consultations feeling confident, knowing exactly what to ask and what a good installation looks like.
This approach breaks down the project of installing an EV charger at home from a big, intimidating task into a series of simple, manageable steps.
Ready to get it done right? Contact RC Generators and Electric today to schedule your no-obligation home assessment in Los Angeles or Ventura County. Our licensed electricians handle everything, from the initial site check to the final city inspection, making sure your home is ready for the future of driving.
EV Charger Installation: Your Questions Answered
Thinking about installing an EV charger? You probably have a few questions. Below, I’ve answered some of the most common ones we get from homeowners here in Los Angeles and Ventura County.
Do I Need a Permit to Install an EV Charger in California?
For a Level 2 charger, the answer is almost always yes. You’re adding a new, dedicated high-power circuit to your home, and that requires a permit to ensure everything is up to code and, most importantly, safe.
The good news? A professional installer like RC Generators and Electric handles all the tedious paperwork and schedules the necessary inspections. You won't have to chase down approvals or figure out which forms to file with the city.
How Much Does It Cost to Upgrade My Electrical Panel for an EV Charger?
This is a big one, and the cost can vary quite a bit. Generally, you can expect a panel upgrade to cost anywhere from $1,500 to $4,000. The final price tag really depends on the complexity of the job and the power rating your home needs.
During a site visit, a qualified electrician will assess your current breaker space, the condition of your wiring, and your panel’s age before giving you a precise, transparent quote. No surprises.
Can I Install an EV Charger If I Live in a Condo or Apartment?
You sure can, thanks to California’s “right-to-charge” laws. These laws prevent HOAs or landlords from unreasonably denying your request to install a charger.
That said, you'll still need to get approval and might have to navigate some shared electrical constraints. The key is to partner with an electrician who has experience with multi-unit buildings. They know how to handle the logistics and get the approvals pushed through.
Will Installing an EV Charger Increase My Home’s Value?
Absolutely. A professionally installed Level 2 charger is a huge selling point for potential buyers, especially in a competitive market like Southern California. It signals that your home is modern, convenient, and future-ready, which can definitely make it more attractive and even command higher offers.
Digging Deeper on Common Concerns
A couple of other questions pop up all the time. One is about the impact on your electric bill. The trick here is to take advantage of time-of-use rates. By charging overnight during off-peak hours, you can cut your charging costs by 30% or more. For example, customers with Southern California Edison can often slash their charging bill nearly in half just by plugging in at the right time.
Another common scenario we discuss is what happens during a power outage. If you already have a home backup generator like a Generac or a battery backup system, many modern EV chargers can integrate directly with them. This means your EV can even become part of your home's backup power solution when the grid goes down.
"Using a licensed installer is non-negotiable. It ensures your installation complies with all local codes and safety protocols, giving you a home upgrade that's completely worry-free." – Senior Electrician at RC Generators and Electric
A Few Best Practices to Keep in Mind
Map It Out First: A solid site assessment is your first step. Figure out the distance from your electrical panel to your preferred parking spot. This simple measurement helps estimate the amount of wiring needed and gives you a better idea of the labor involved.
Get Multiple Quotes: Always get at least three itemized quotes from C-10 licensed contractors. Compare the breakdown of labor, materials, permit fees, and the project timeline. This is the best way to find a reliable installer at a fair price.
Don't Skimp on Materials: If your charger will be exposed to the elements, make sure your installer uses quality materials rated for outdoor use. Things like moisture-sealed wiring and UV-resistant cables are critical for preventing damage over time.
Keep Your Paperwork: Once the job is done, keep all your documents—permits, inspection reports, and warranty info—in one place. A dedicated folder or a digital file works great. You’ll be glad you have them if you ever sell your home or plan future electrical work.
Ready to stop guessing and start charging? Contact the local experts who know Southern California's rules inside and out. We’ll get you set up safely and correctly.